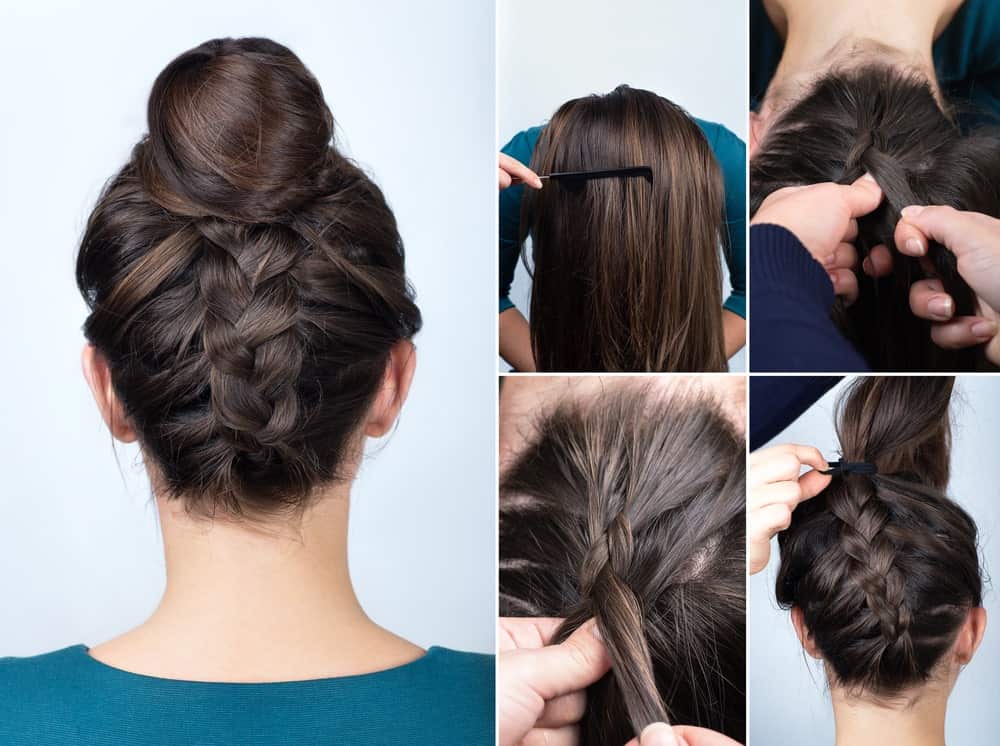
Having a versatile hairstyle to carry you from work to a night out, to an evening affair takes one more thing off of your To-Do list. This Boho braid tutorial will take you through each so you can make fun and elegant style work for you no matter the occasion. It may look complicated, but hopefully, by the end, the results will look just like the picture; or at least something close to it.
Step 1: Preparing for the Journey Ahead
You should always begin hairstyling with freshly washed and dried hair. The tools you’ll need will include:
- 1 Thin comb for sectioning and parting the hair*
- 1 Hair brush
- 3 Elastic hair ties to keep hair sections separate & complete hairstyle
- 10 Hair Grip pins (bobby pins) to complete the style
- Styling mousse or gel to tame flyaways
- Holding hairspray to finish
Thicker combs can be used if the person whose hair is being styled has a heightened sense of pain while getting their hair done. The lines may not be as straight, but the style should still come out similar to the picture.
Step 2: Separating the Hair Into Sections
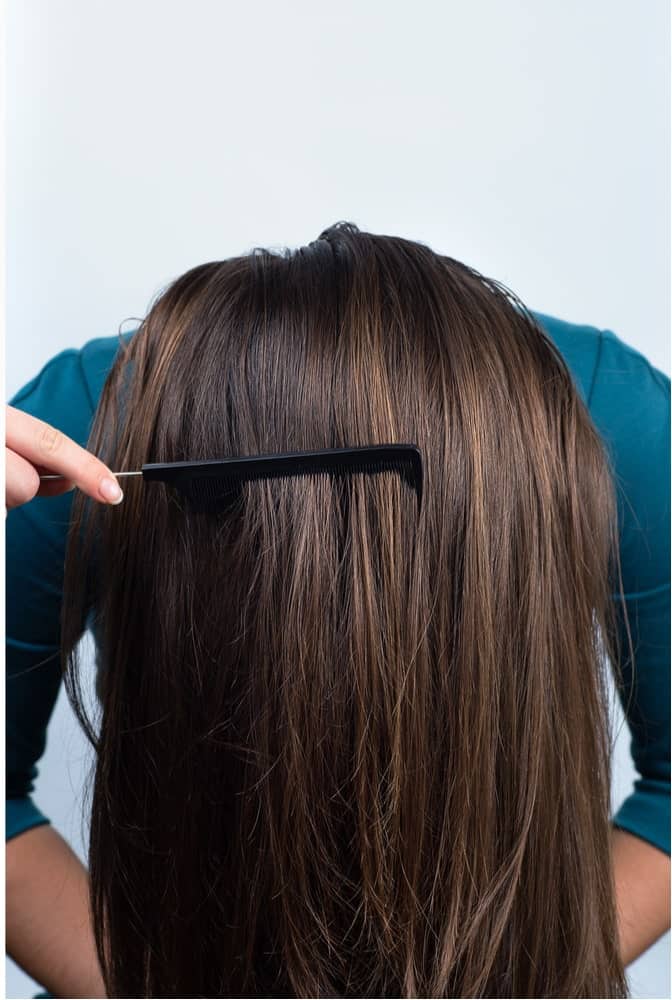
After ensuring the entire head is free of tangles, you’ll need to separate the hair into two sections, the front and the back. Beginning at the crown, the center of the scalp, use the comb to draw a line through hair down to the right ear keeping the front section separate from the back. Return to the crown to draw a line down to the left ear. Once you’ve separated the two halves, you’ll want to be sure the back section has a bit more hair than the front since that’s the portion of hair that will be braided.
Use a hair tie to secure the back portion out of the way. Brush the front section of the hair into a ponytail and secure with another hair tie. Use the gel or styling mousse to keep those front strands neat and in place as you wrap the ponytail around itself into a small bun. Use one or two hair grip pins to anchor the tip of the ponytail to the base of the bun.
Once the front section is secured in a hair tie and bun, release the back section from its hair tie and brush it all forward to prepare it for braiding.
Step 3: Take it to the Back Now Y’all
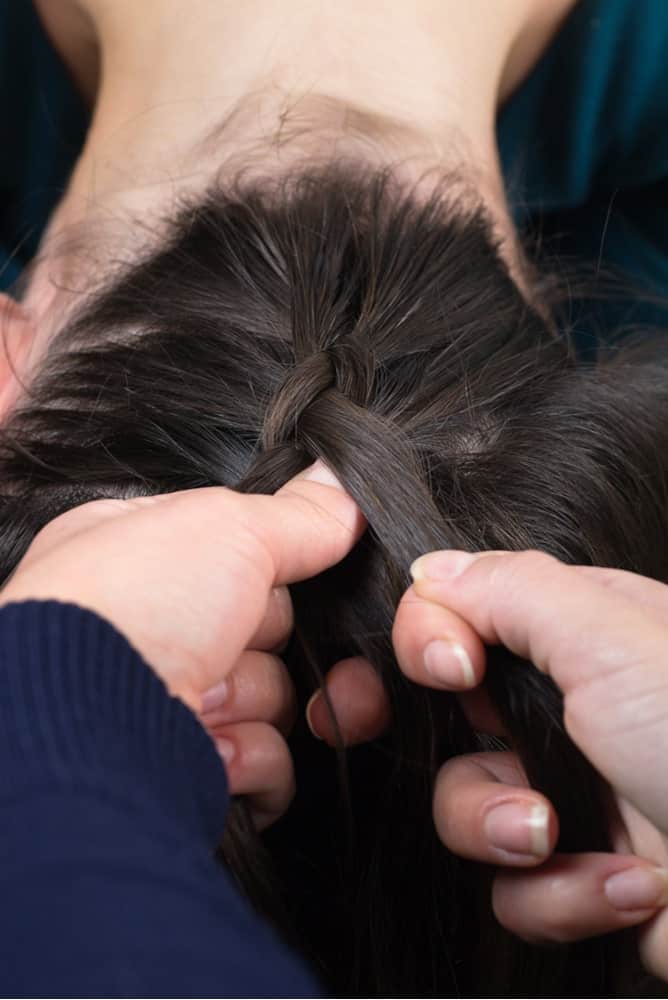
Now that you have the back section of the hair brushed forward, you can use the comb or your finger to separate a thin section of hair across the nape of the neck. Take that thin section and separate it into three pieces. The best way to start the braid is to take the middle piece and place it over the left piece. Next, hold the left piece in your right hand and bring it over the right piece of hair. Grab that right piece of hair with your left hand and pull it over the middle piece that’s now on the left side.
Step 4: Keep on Braiding
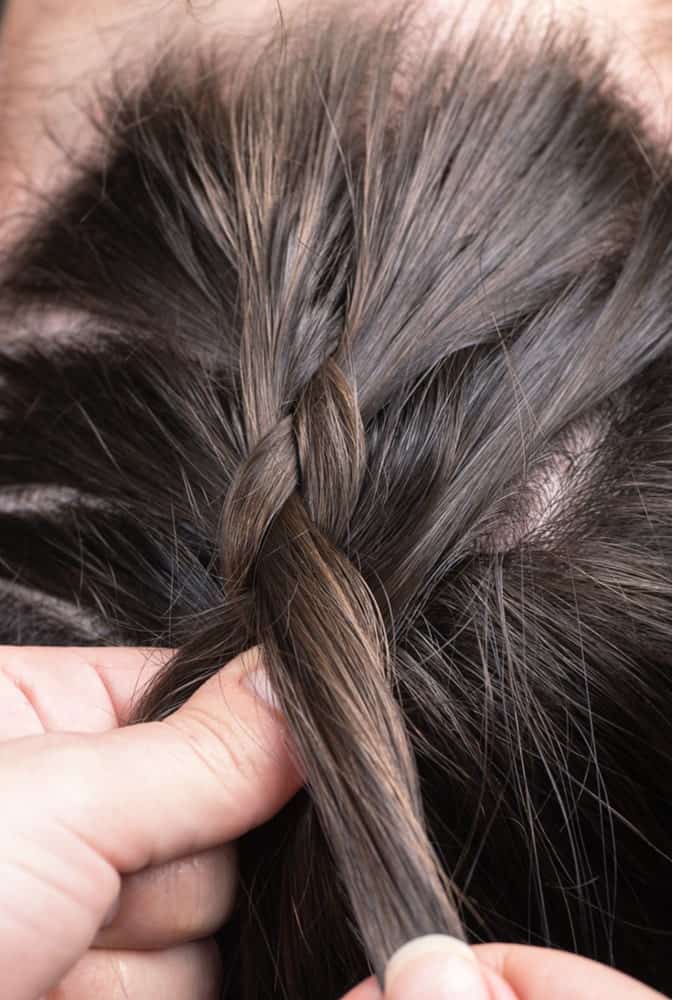
Picking up where we left off, you should have two pieces of hair to the left and one piece of hair on the right. The middle piece of hair should cross over the left piece making it the new left section. Take another small section of hair to add to the piece of hair that is now in the middle and pull it to the right side of the section. It should be pulled over the right piece of hair now making the middle the right section of hair. You’re going to repeat this same motion.
Add a little bit of hair to the middle piece of hair and pull it over to the left side. This will now make the left section the middle where you add a little bit of hair to the middle section and pull it across to the left side over the piece of hair waiting there. The left side now becomes the middle piece where, again, you add more hair and pull it over to the right side keeping it over the hair already there.
The right side becomes the middle piece where you add more hair and pull it to the left side, still making sure to pull it over the piece waiting there.
The left side becomes the middle piece where you continue to add hair and pull it over to the right making sure to keep it over the hair waiting to become the new middle piece.
Continue this pattern until the entire back section of the hair is braided.
Step 5: Bringing It All Together

Take your time with the previous step until it looks like the style in the picture, or however you’d prefer it. Practice makes perfect, so while it may not look exactly as you imagined incorporating all of the hair in the back section of the hair into a single braid is an achievement.
Use one of the hair ties to secure the braid making sure to have it centered so that it can line up with the ponytail from the front section.
Step 6: The Finishing Touch
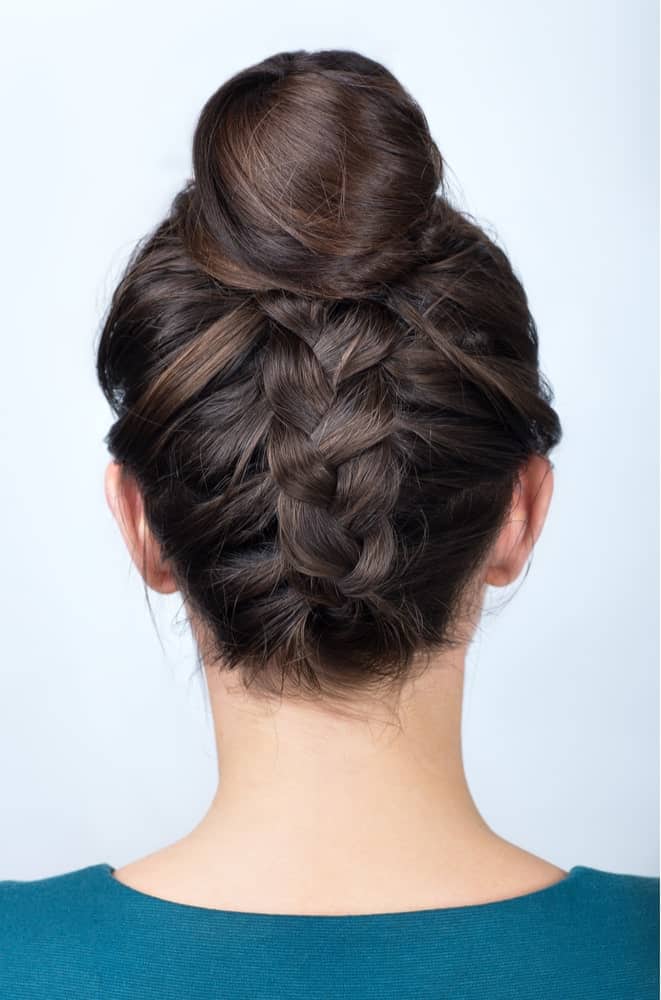
You have a few options here to finish this elegant and fun Boho braided bun.
Option 1
You may have to redo the front section if it mussed while putting in the braid. If that’s the case, remove the hair grip pins and hair tie securing it. Add additional styling gel or mousse if necessary. Brush the front section toward the center of the crown where your braid is waiting in its own hair tie.
Smooth down those flyaways and combine the front section of hair with the braid and secure with a hair tie. Wrap the ponytail around itself into a bun. Use the hair grip pins to secure the tip of the ponytail under the bun and the hair being pulled into the hair tie. Feel free to spray with the holding spray so the style can stay for hours or even overnight.
Option 2
If the front section is still intact, you have some room to get really creative with what you can do with the braid of the rear section. Split the braided ponytail into two even sections. Use the right section of the braid’s ponytail to wrap around the left side of the front bun.
Continue wrapping the section clockwise and secure the piece of hair under the bun with a hair grip pin. Take the remaining left section of the braid’s ponytail and wrap it around the right side of the front bun. Continue wrapping the hair counter-clockwise around the bun. Secure the end of the left section under the bun with a hair grip pin.
Spray the holding spray at least six inches away from the style to set it in place. It’s necessary to hold the spray a few inches away so it doesn’t create one spot of sticky hair.